This blog details role definition and authorization in Cloud security and also the procedures of Role Creation.
To create a role, follow these steps:
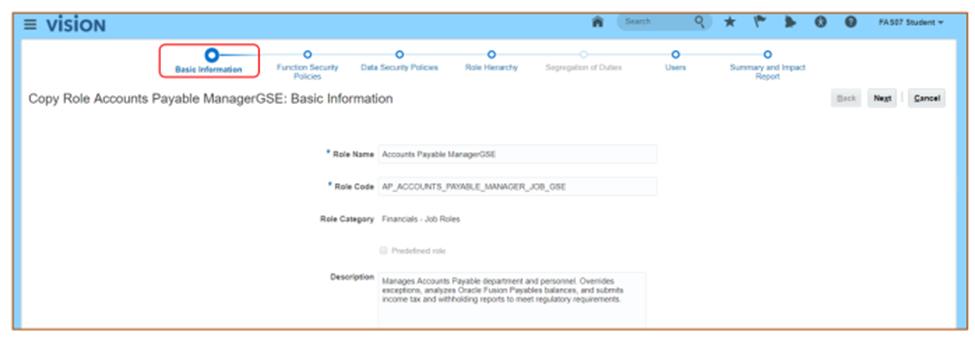
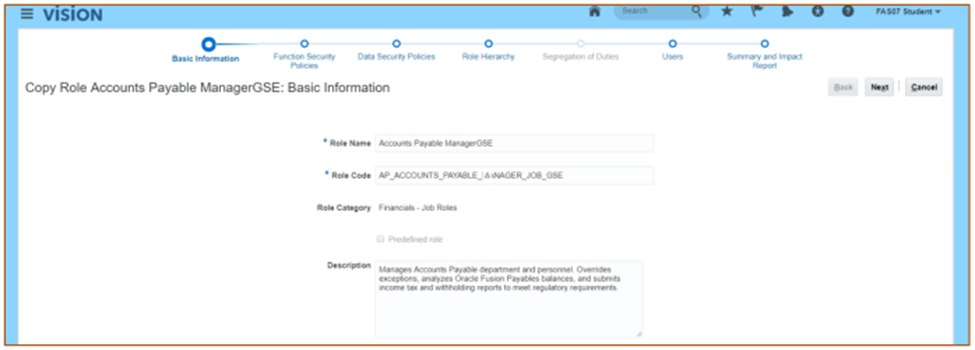
Step 1: Basic Information
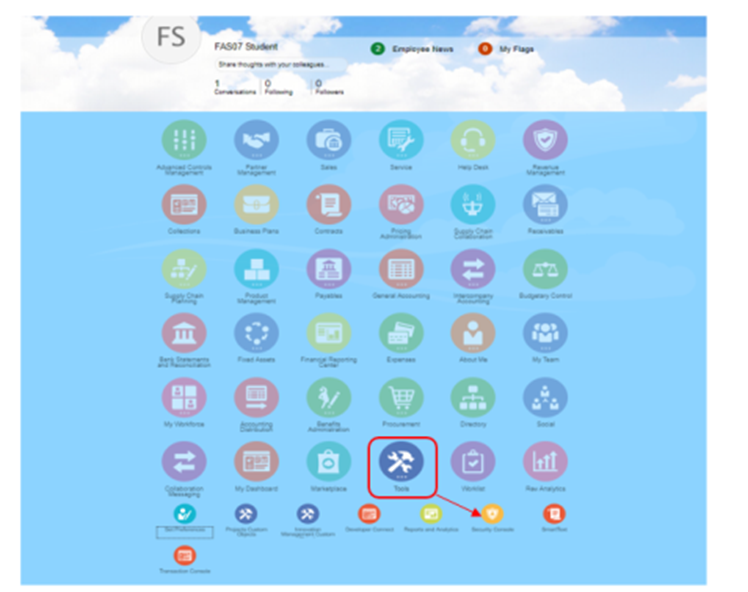
- Navigate to Tools and Security Console.
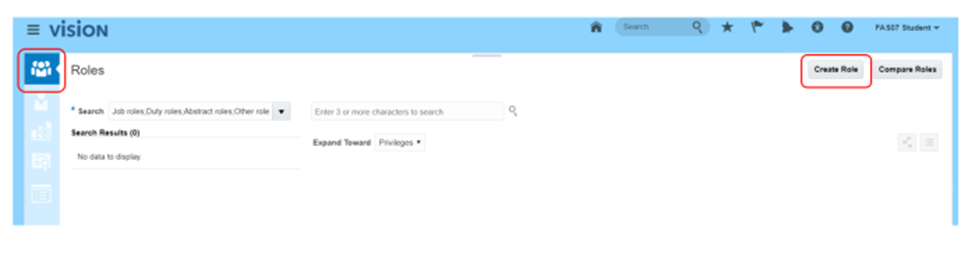
- Click the ‘Create Role’ button in the top right corner of the roles screen.
- Provide basic role information such as Role name, Role code, Role Category, and Description.
- Click ‘Next.’
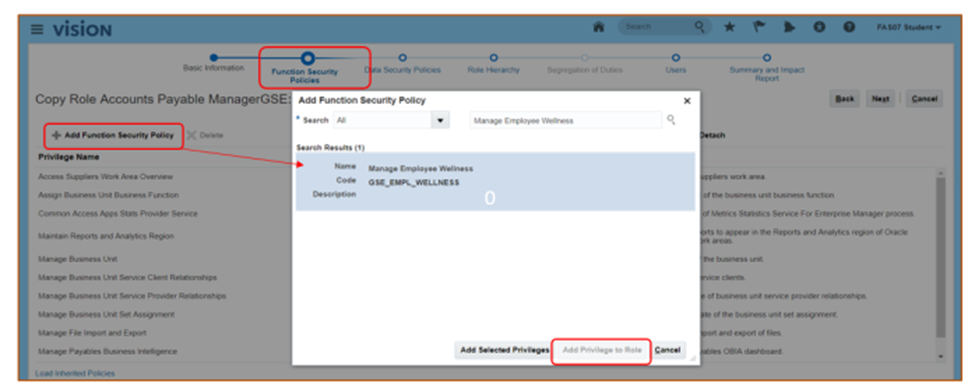
Step 2: Function Security Policies
- Function security policies encompass privileges assigned to duty roles, and those duty roles assigned to a job or abstract role. These policies are defined in the Authorization Policy Manager (APM).
- Click ‘Add Privilege to Role.’
- Add the desired privileges to the role.
- Click ‘Next.’
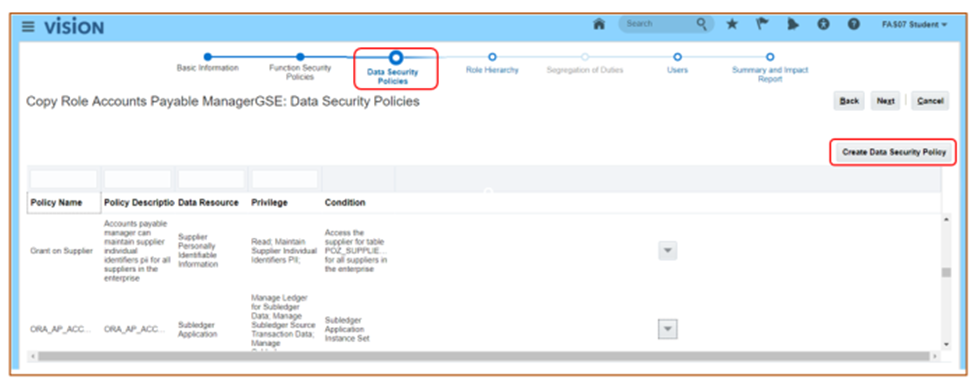
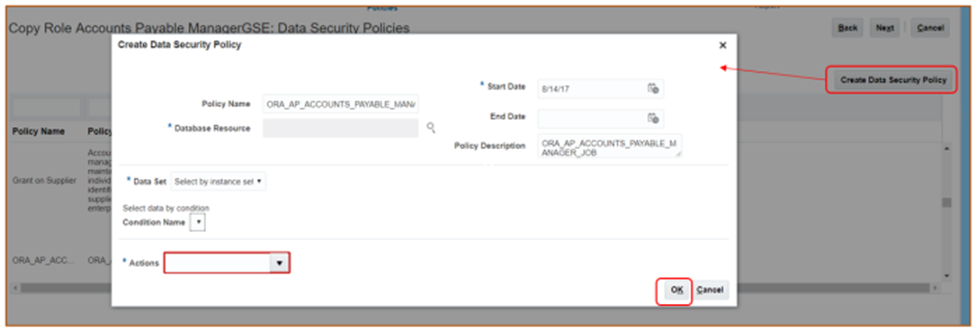
Step 3: Data Security Policies
- Data Security Policies define the conditions for granting data access to a role.
- Click ‘Create Data Security Policy’ to attach policies to the role.
- Enter the Policy name, Database Resource, etc.
- Click ‘Ok.’
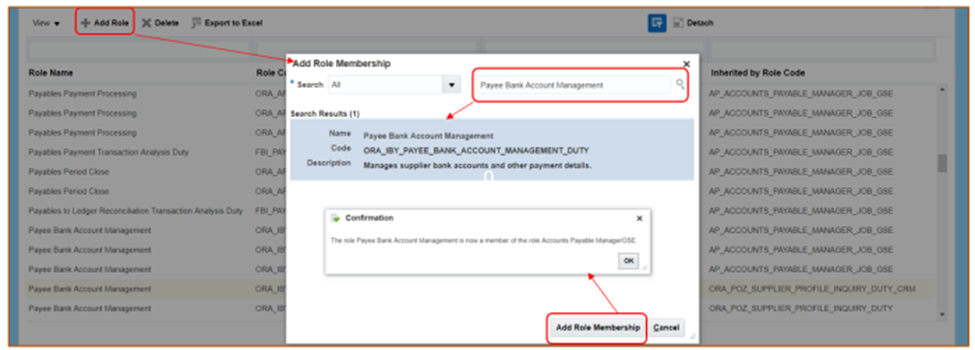
Step 4: Role Hierarchy
- Navigate to Role Hierarchy.
- Click ‘Add Role.’
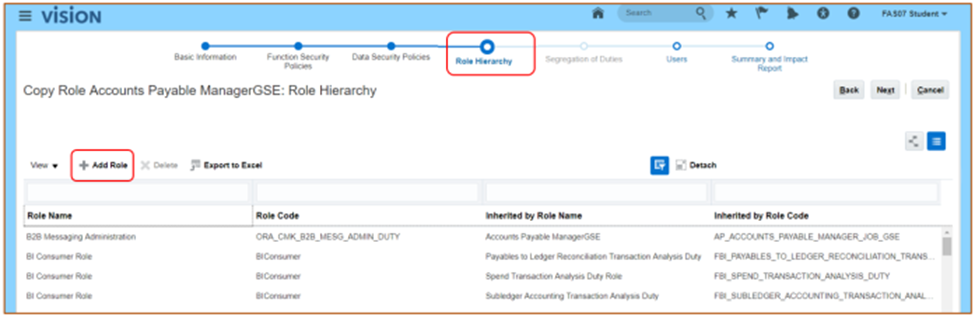
- Add child roles as needed.
- For Duty roles, you can add duty roles or aggregate privileges.
- For job or abstract roles, add aggregate privileges, duty roles, or other job/abstract roles.
- Select the specific role and then ‘Add to role membership.’
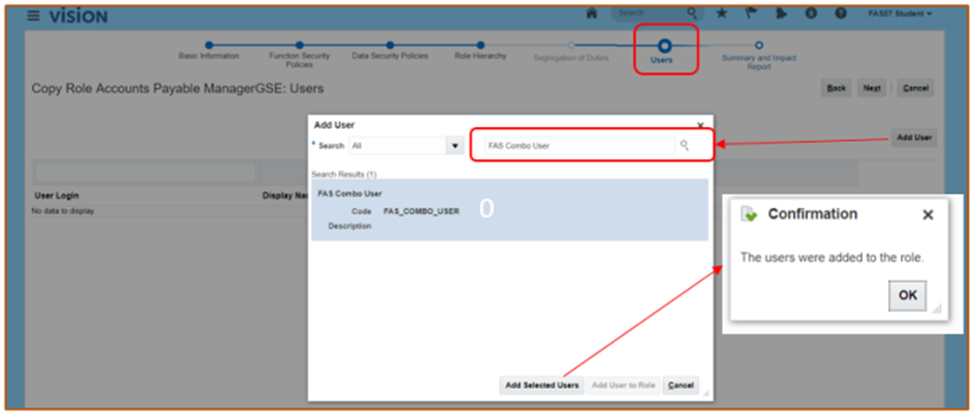
Step 5: Users
- Select users to whom you want to assign the role you are creating.
- You cannot directly assign a duty role to the users.
- Click ‘Add User.’
- In the search field, select ‘Users’ or the types of roles in any combination.
- Enter at least three characters to search for values.
- Select a user or role.
- If you choose a user, select ‘Add User to Role.’ If you choose a role, select ‘Add Selected Users.’
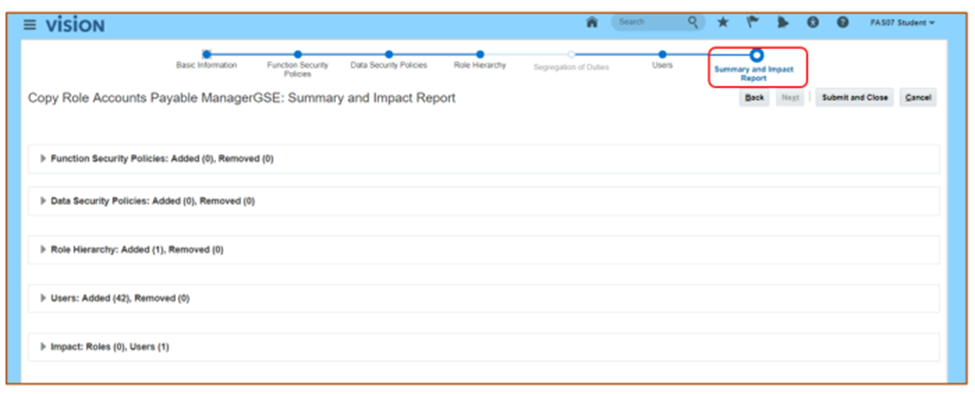
Step 6: Summary & Impact Report
- The summary lists the number of function security policies, data security policies, roles, and users you have added and removed.
Role Creation- Copy Role
- You can copy a role and then edit the copy to create a new role.
- Search for the role you wish to edit or copy and click the down arrow in the search result.
- Choose a method to copy the role.
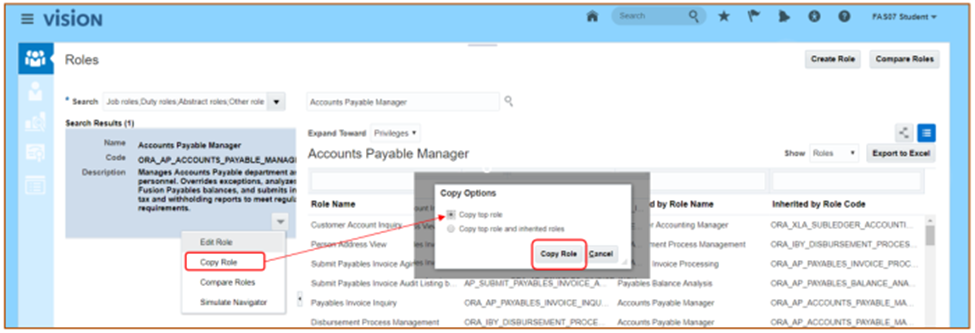
- Rename the copied role and create a new role with the same privileges and security policies.
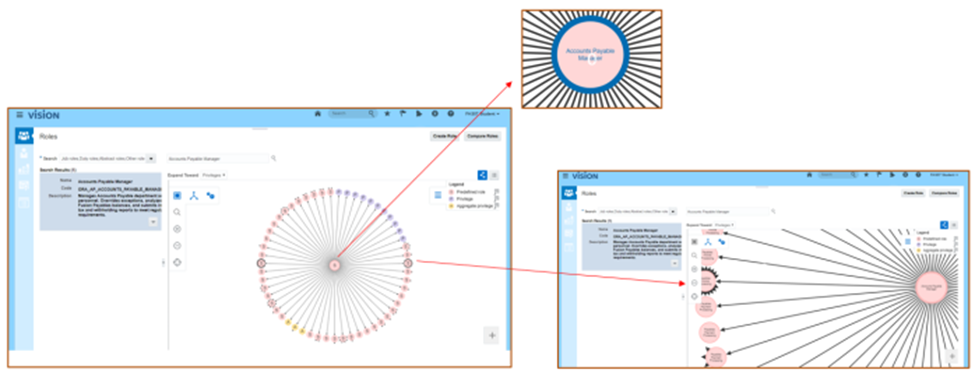
Role Creation- Graph Visualization
- You can select either the Radial or Layers view.
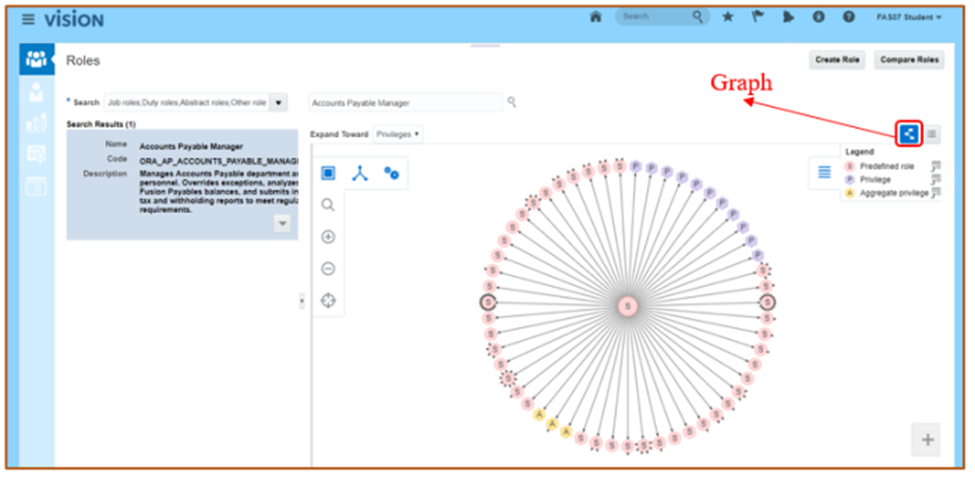
- Zoom in or out of the image.
- If the image is smaller, the symbols replace the names:
- U for the user,
- R for a role,
- S for the predefined role,
- P for the privilege, and
- A for the Aggregate privilege.
- You can also add, edit, or delete privileges and roles here.
By following the given steps, you can successfully create the Roles.
Leave a Reply