In the realm of creating OTBI reports and accessing pre-built reports within the Oracle system, following a structured procedure is essential. This guide will walk you through the step-by-step process, ensuring you can efficiently create and customize your OTBI reports and effortlessly access pre-built reports under the Risk Management Cloud’s “Advanced Access Controls.” Let’s get started.
Step 1: Begin by creating an OTBI report.
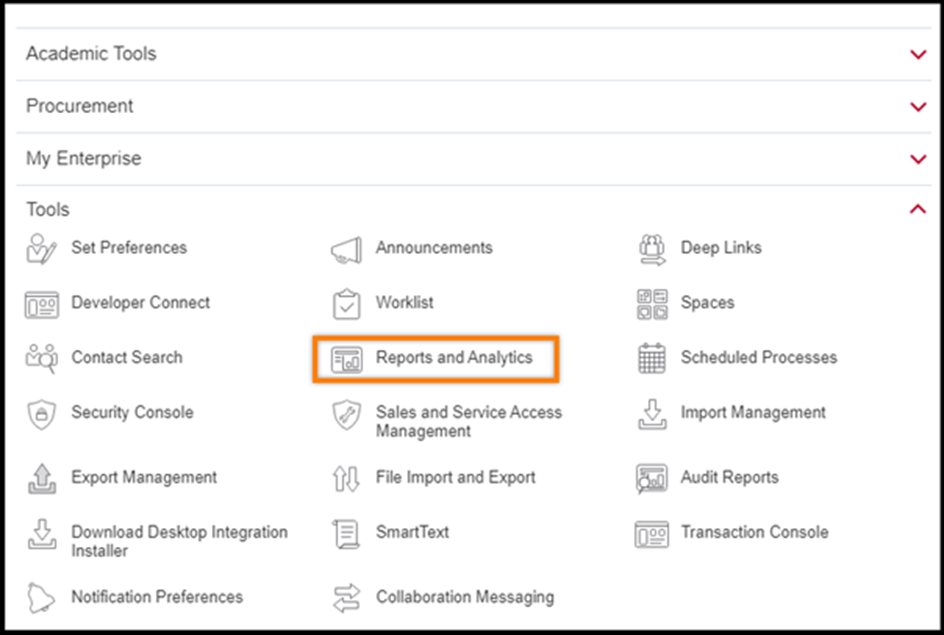
Step 2: Start by navigating to the “Tools” section from the main menu.
Step 3: Click “Reports and Analytics.”
Step 4: In the Reports and Analytics interface, locate the “Browse Catalog” button and click on it.

Step 5: From the “New” dropdown menu, select “Analysis.”

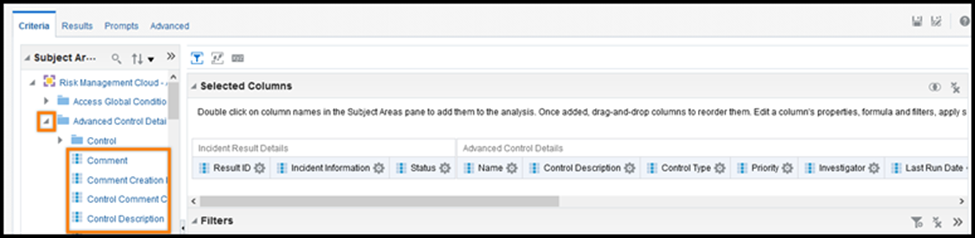
Step 6: In this specific case, we are focusing on the “Risk Management Cloud: Advanced Access Controls” analysis, which provides information related to Oracle Advanced Access Controls.

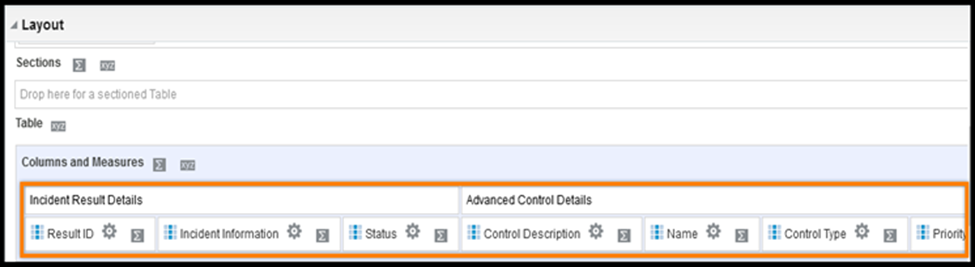
Step 7: You can explore the available columns by expanding folders, and if you wish to include a particular column in your report, double-click on its name.
Step 8: If you’re combining columns from different object tables (folders), make sure to include a fact column for proper data integration.
Step 9: To customize a column, click on the gear icon. You can apply various options such as sorting, adding formulas, editing column properties for appearance, applying filters, or deleting the column as needed.

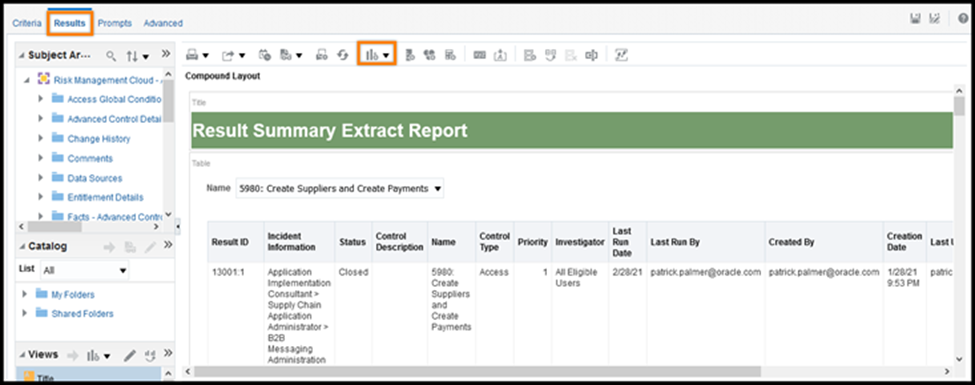
Step 10: Switch to the “Results” tab to view and edit the report’s results. You can also incorporate a graph by clicking on the bar graph icon.
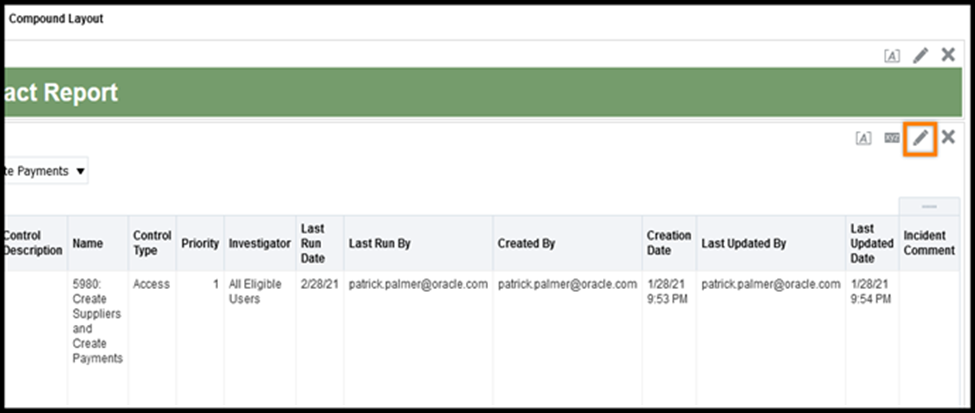
Step 11: If you want to modify the columns, click on the pencil icon. This allows you to format the columns, rearrange their order, and enable prompts by dragging columns into the ‘Table Prompts’ section. Additionally, you can hide the facts table in the results by clicking the gear icon or dragging columns to the “Excluded” section.
Step 12: Once you’ve made the necessary adjustments, click the “Done” button in the upper right corner to save your changes.
Step 13: Save the report by clicking the “Save Analysis” icon.

Step 14: To access pre-built reports, follow these steps:
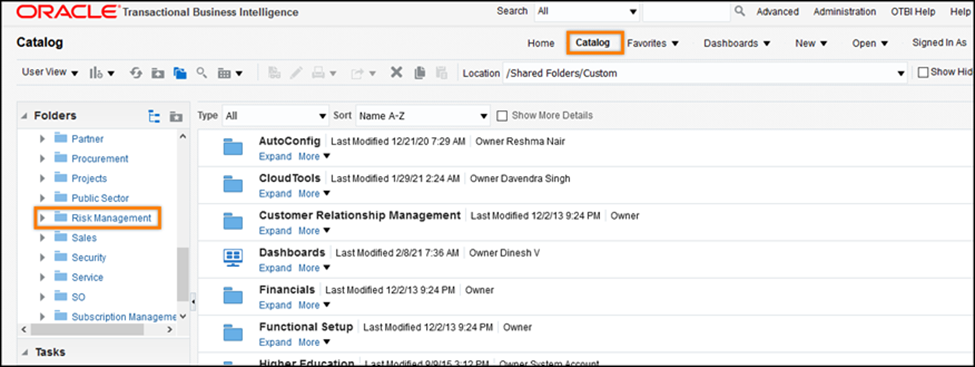
- Click on “Catalog.”
- Under “Shared Folders,” select “Risk Management.”
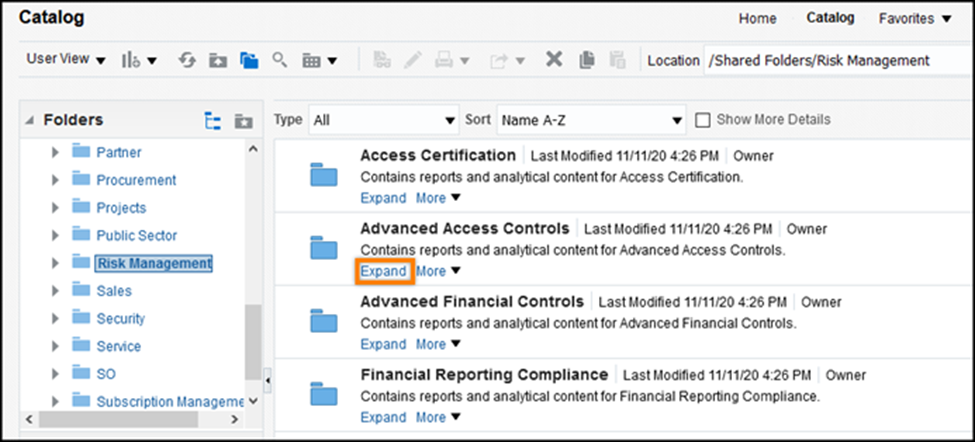
- Expand the “Advanced Access Controls” section.
- Further expand the “Administration” folder.

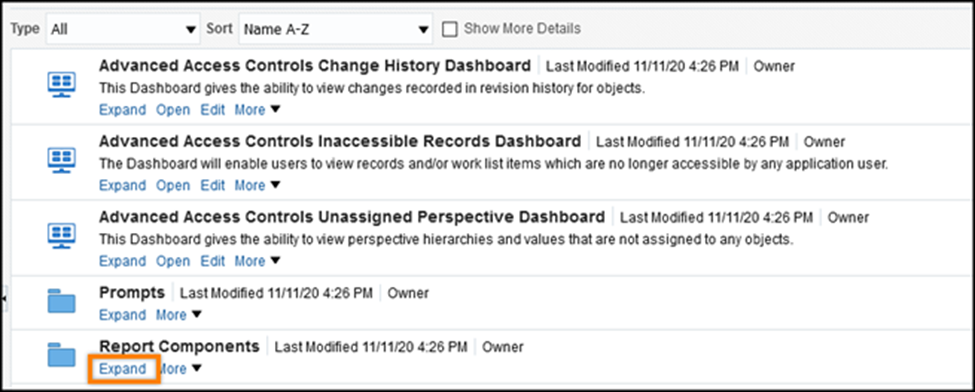
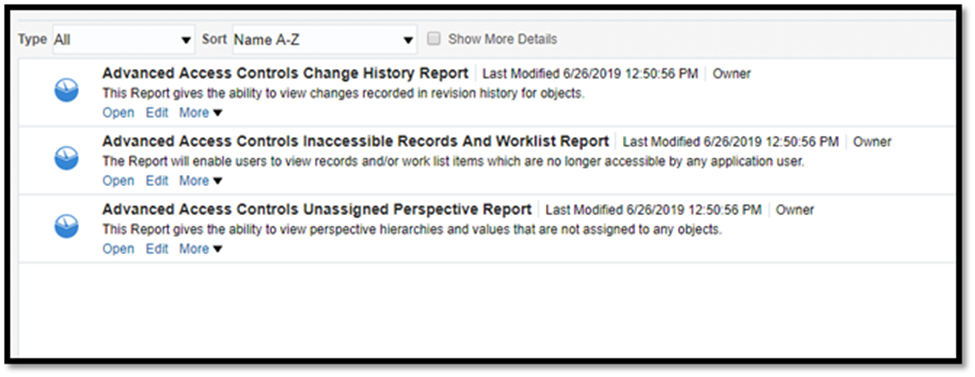
- Within the “Report Components” folder, you’ll find various pre-built reports, including “Advanced Access Controls Change History Report,” “Advanced Access Controls Inaccessible Records and Worklist Report,” and “Advanced Access Controls Unassigned Perspective Report.”
In conclusion, these instructions provide a comprehensive overview of creating OTBI reports and accessing pre-built reports related to Risk Management Cloud’s “Advanced Access Controls.” By following these steps, you’ll be equipped to harness the full potential of Oracle’s reporting and analytics capabilities, offering valuable insights and data-driven decision-making for your organization. Whether you’re crafting custom reports or utilizing pre-built resources, this guide empowers you to make the most of Oracle’s reporting tools.
Leave a Reply