In this blog, we will walk you through the process of creating a sandbox environment and editing pages within it. The below steps will enable you to efficiently manage and modify content in your sandbox.
Steps to create a sandbox
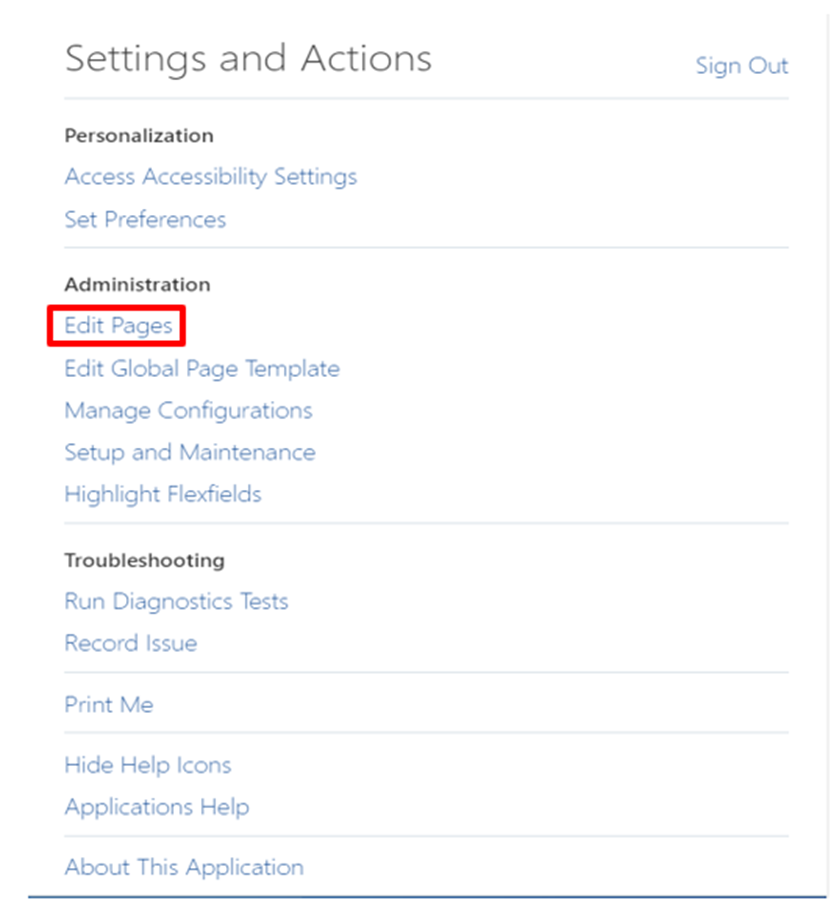
Step 1: Navigate to the profile icon
Step 2: Select edit pages
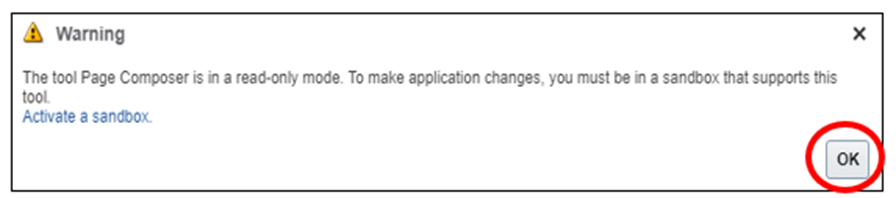
Step 3: Select “Ok”
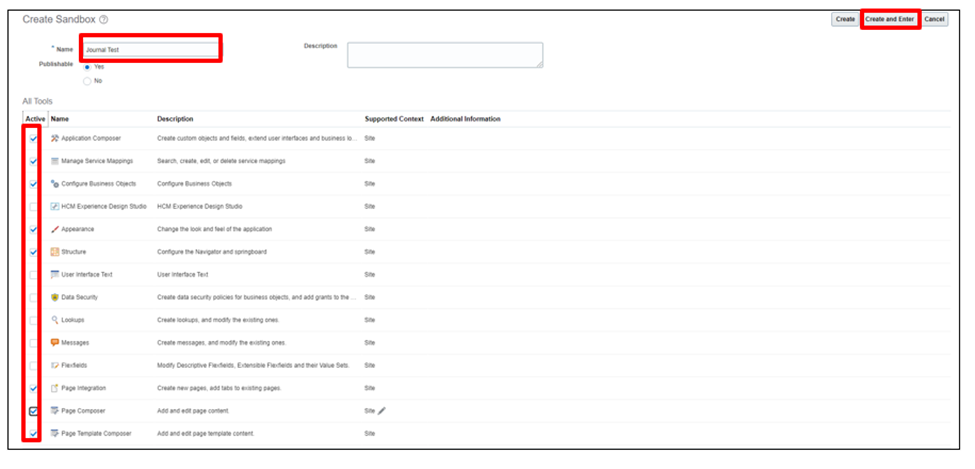
Step 4: Click “Create sandbox”

Step 5: Begin by providing a name and checking the corresponding checkbox as depicted below.
Step 6: Click on ‘Create’ and proceed.
Steps to edit the page
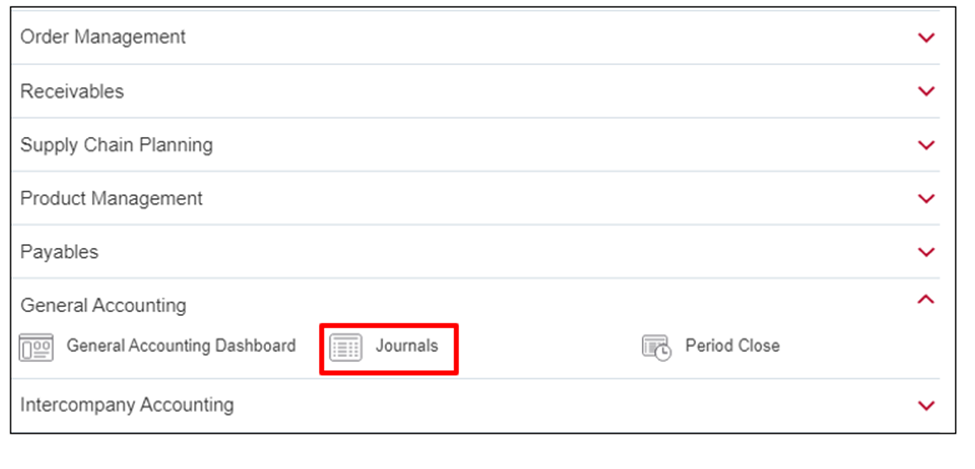
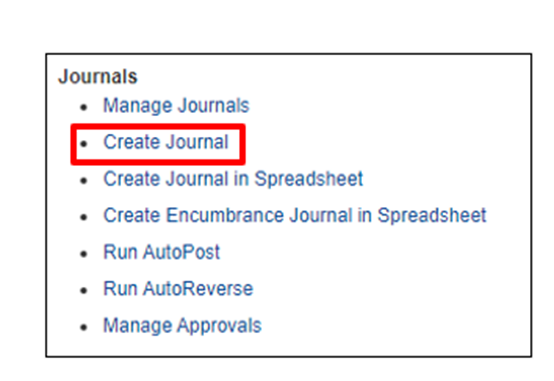
Step 1: Navigate to ‘General Accounting’ and select ‘Journals.’
Step 2: Choose ‘Create Journal.’
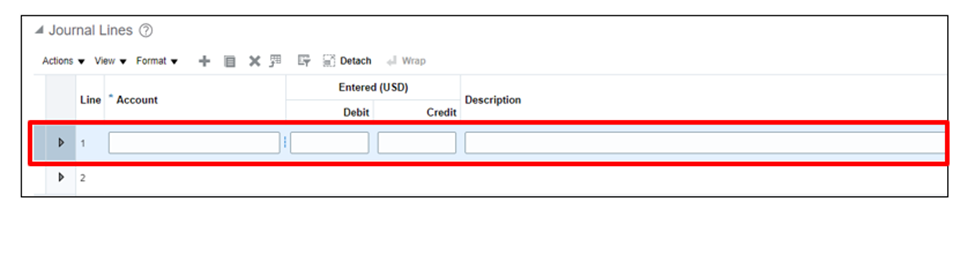
Step 3: Fill in all the mandatory fields.
Step 4: Access the Profile icon and select ‘Edit Pages.’

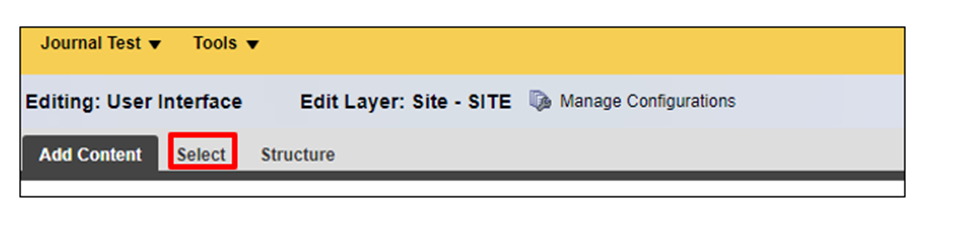
Step 5: Click ‘Select.’
Step 6: Move the mouse to the desired location for content modification.
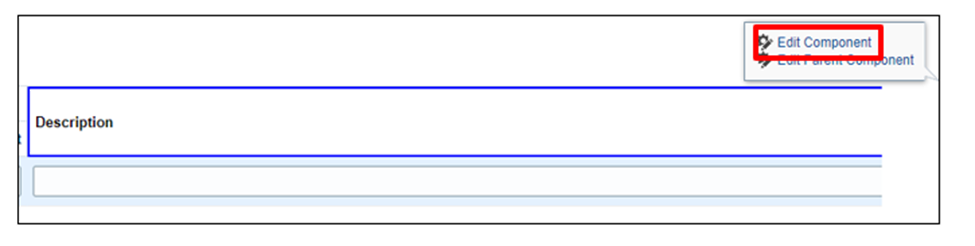
Step 7: Choose ‘Edit Component.’
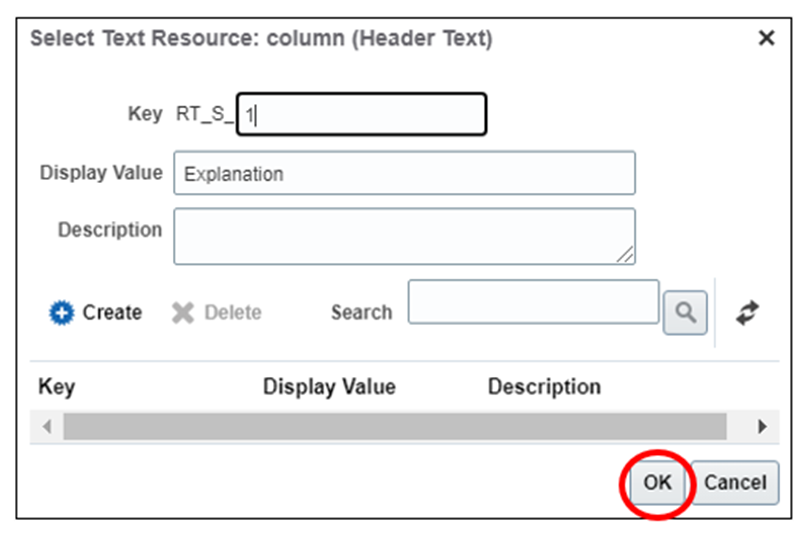
Step 8: Select ‘Select Text Resource.’
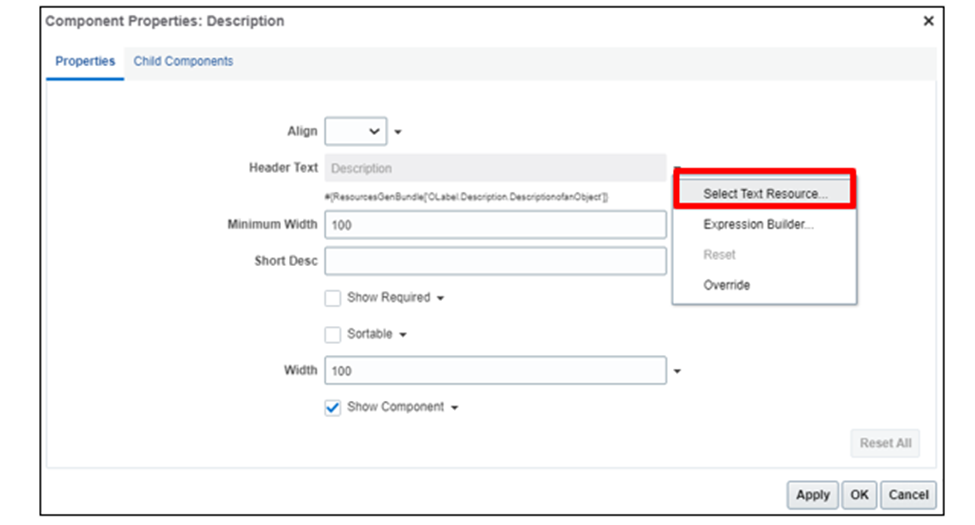
Step 9: Input the necessary fields and click ‘OK.’
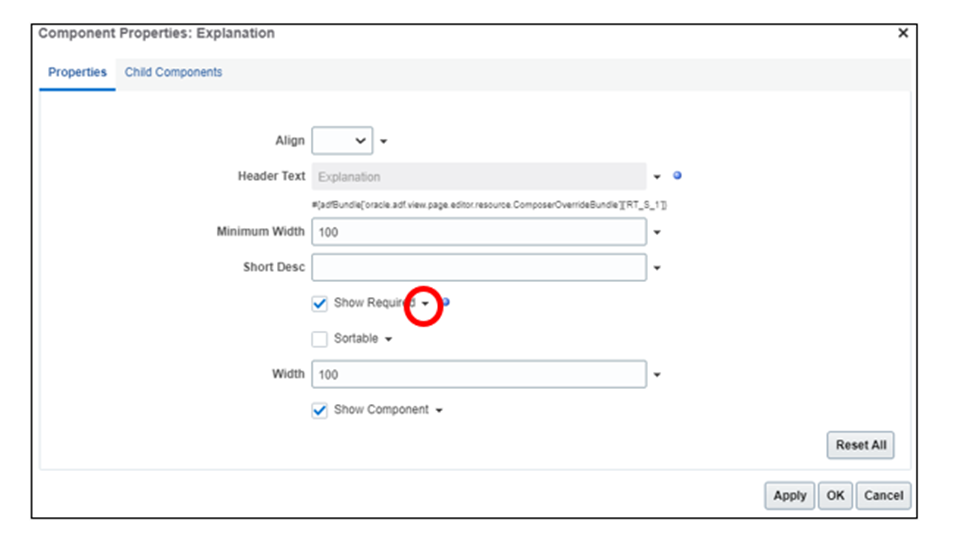
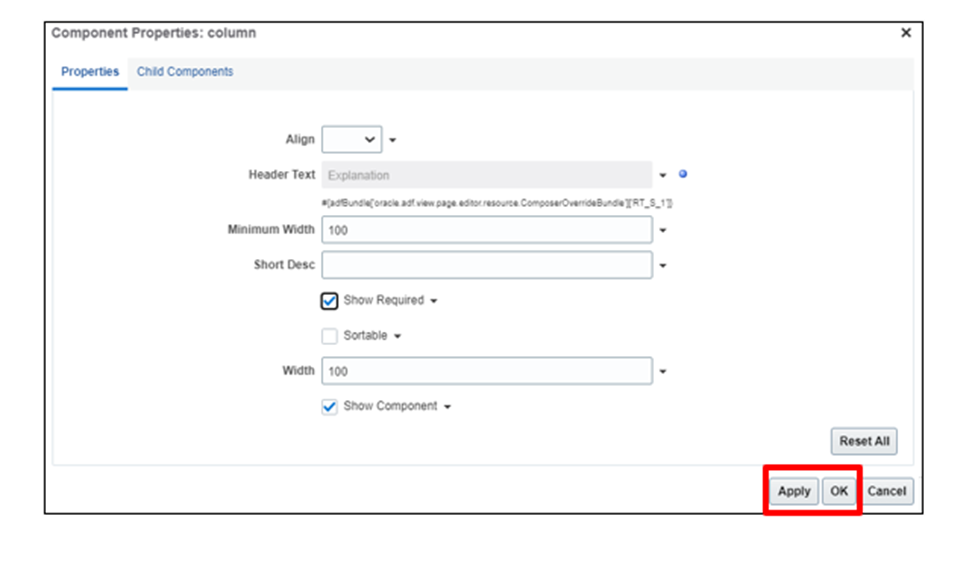
Step 10: Click on ‘Show Required.’
Step 11: Set it to ‘true’ and click ‘OK.’
Step 12: Confirm by clicking ‘Apply’ and ‘OK.’
Step 13: Observe the changes (1).
Step 14: Hover over to the next column.
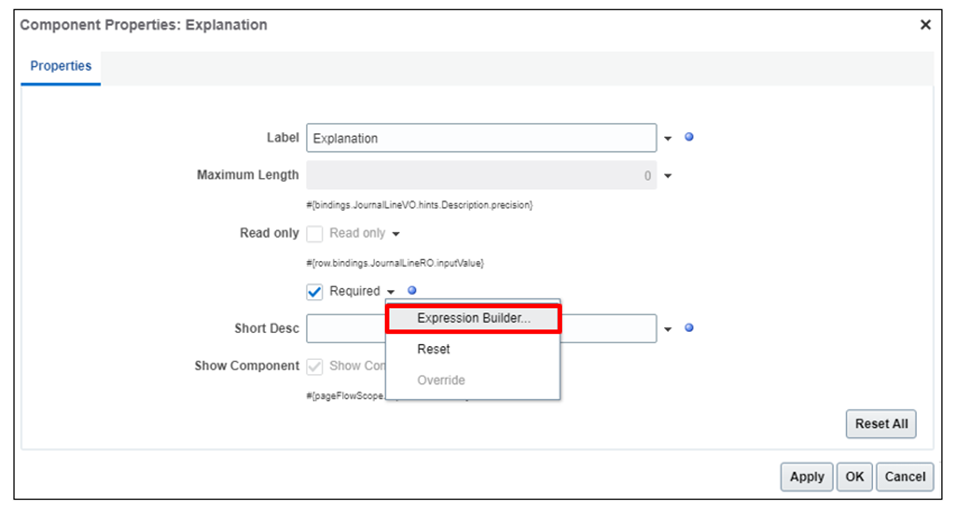
Step 15: Click ‘Edit Component’ (2).

Step 16: Input the fields as illustrated below and click ‘OK.’
Step 17: Navigate to ‘Required’ and use the ‘Expression Builder.’
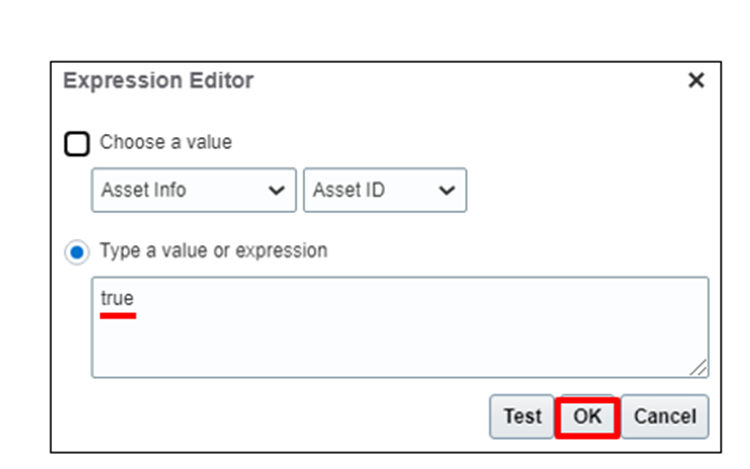
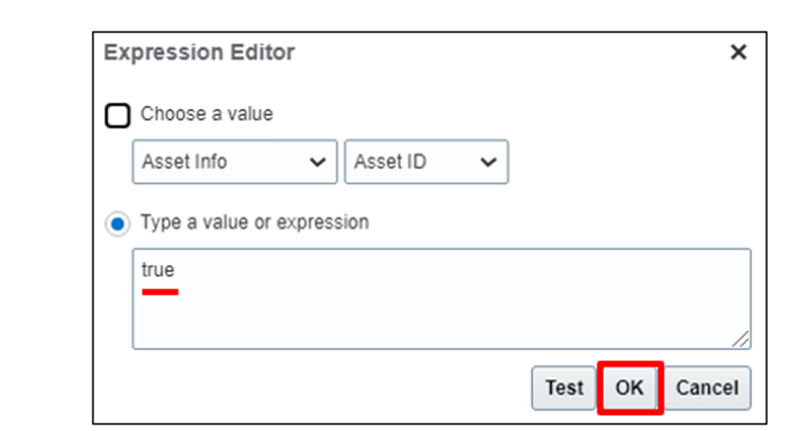
Step 18: Set the value to ‘true.’
Step 19: Click ‘OK.’
Step 20: Click the symbol.
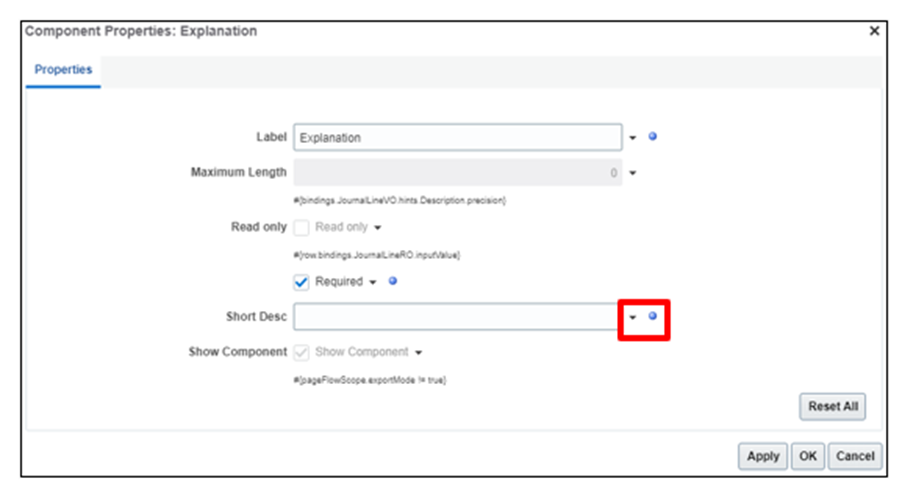
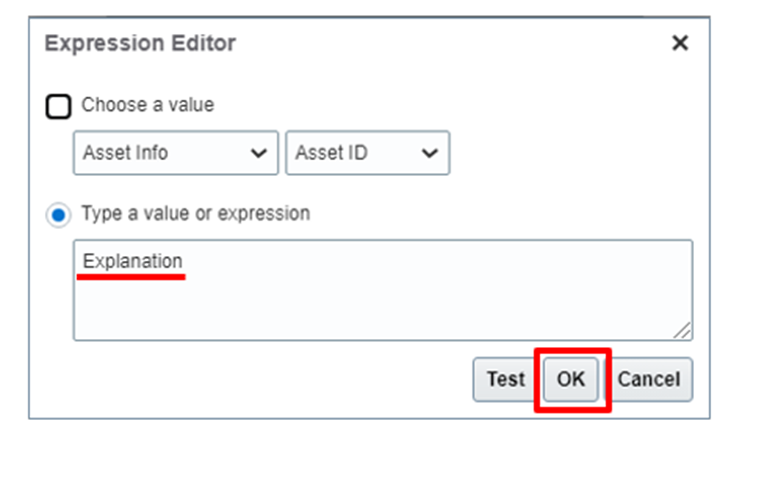
Step 21: Provide ‘Explanation’ as the value.
Step 22: Click ‘OK.’
Step 23: Verify the completed changes.
Step 24: Exit the Sandbox.

By following the given steps, you have now successfully created a sandbox environment and made the necessary page edits.
Leave a Reply