Creating custom roles in your organization’s security console is essential for tailoring user access to specific functions and data within your enterprise software. This process ensures that your employees have the right permissions and access to perform their roles effectively. In this guide, we will walk you through the step-by-step process of creating a custom role, using the example of an ‘Accounts Payable Manager’ role.
Custom Role Creation Process:
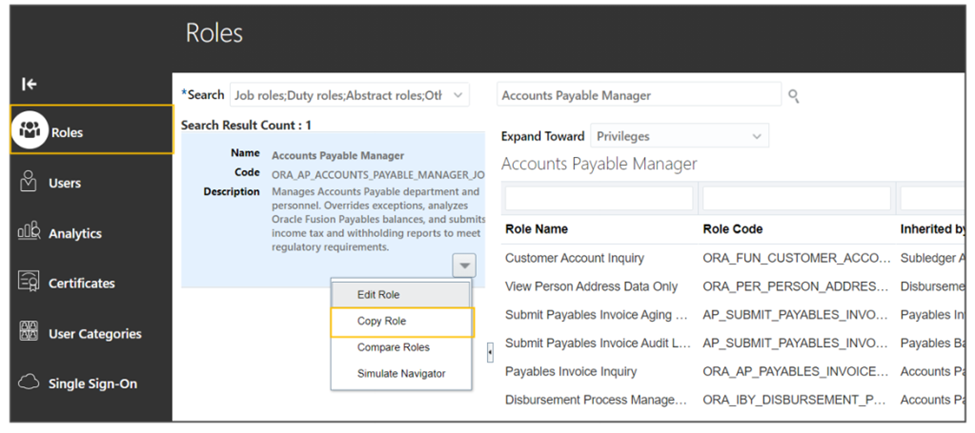
Step 1: Begin by navigating to the following location: Navigator -> Tools -> Security Console -> Roles.
Step 2: Locate the ‘Accounts Payable Manager’ role in the search results, and choose the ‘Copy Role’ option.
Step 3: Within the ‘Copy Options’ section, select ‘Copy the top role and its inherited roles,’ then proceed by clicking ‘Copy.’

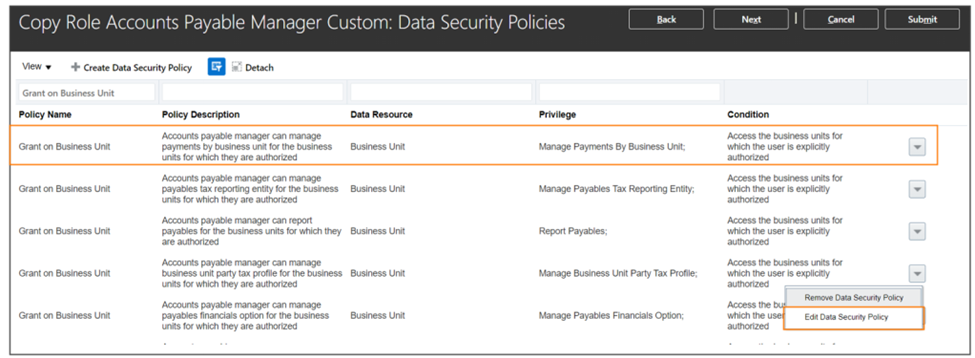
Step 4: In the ‘Data Security Policies’ section, make necessary edits to grant access for all business units instead of specific ones.
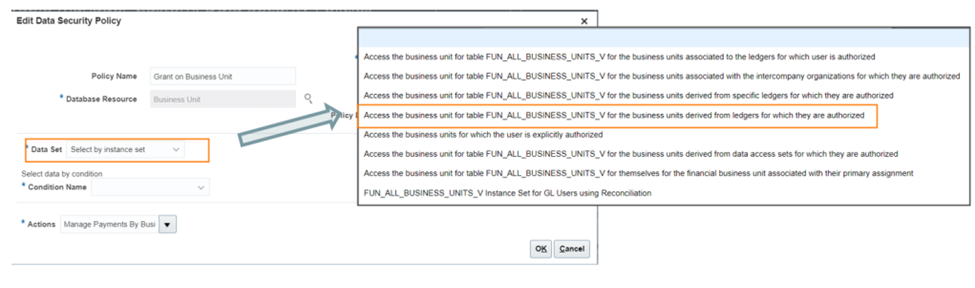
Step 5: Navigate to ‘Business Unit’ and switch the data set from ‘Select by Instance Set’ to ‘Select data by Conditions’ from the dropdown menu.
Step 6: Confirm the changes by clicking ‘OK’
Step 7: Proceed to the ‘Summary and Impact Report’ section, review the modifications, and finalize by clicking ‘Submit and Close.’
Step 8: Your custom role is now ready for utilization. You can assign users to this custom role, providing them access to the functions of an Accounts Payable Manager across all business units.

By following the steps outlined in this blog, you can ensure that your employees have the appropriate access to perform their job functions while maintaining data security. Once the custom role is created, it can be assigned to users, granting them access to the relevant functions and data, ultimately contributing to a more streamlined and secure operation within your organization.
Leave a Reply