Effective user account management is a cornerstone of robust cloud security. These instructions provide a step-by-step guide to navigating the Cloud Security Console, creating new user accounts, assigning roles, and making necessary updates to user details.
Cloud Security: User Creation
- To create a new user account, navigate to the ‘Tools’ menu.
- Within the ‘Security Console,’ select the ‘User’ tab located in the upper-left corner of the screen.
- In this section, you have the capability to lock user accounts, reset passwords, and delete user accounts.
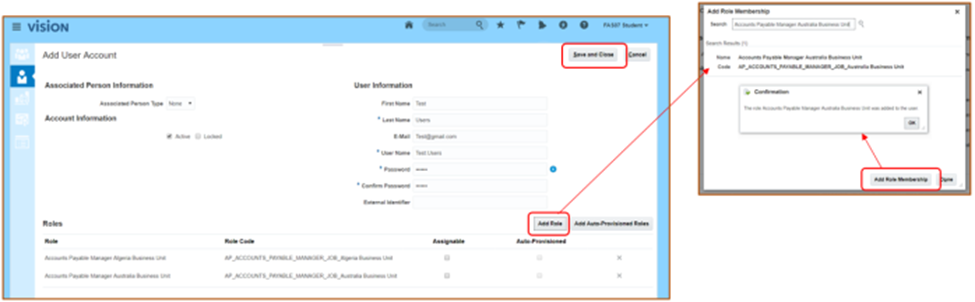
- Click on ‘Add User Account’ to initiate the user creation process.

- Enter the essential user details, including the username and password.
- After providing the required information, click ‘Save and Close.’
- To assign roles to the user, click ‘Add Role.’
- In the pop-up window, you can search for available roles and add them to the user’s role membership.
- Once the role is successfully added to the user, a confirmation message will appear in a pop-up.
- Viewing and Editing User Details:
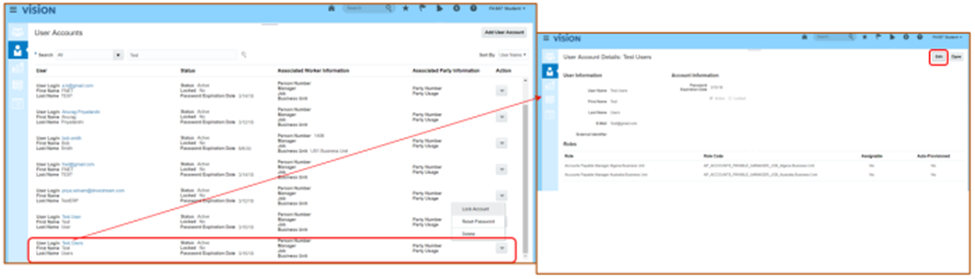
- You can view the created user account by clicking on the user’s name.
- This will provide you with a detailed view of the user, along with the assigned roles.
- To make changes to the user’s details, click ‘Edit.’
- Editing User Details and Resetting Password
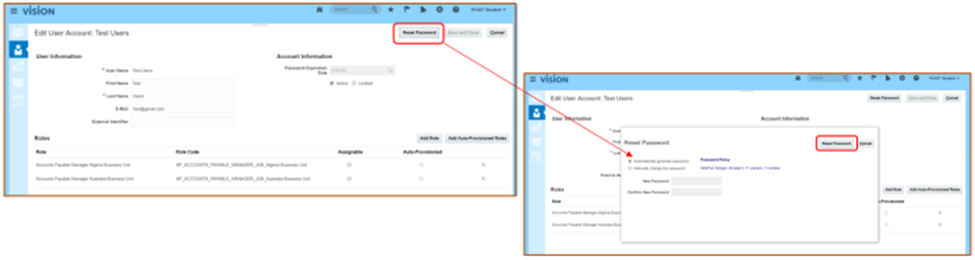
- Clicking ‘Edit’ will take you to the ‘Edit User Details’ window.
- In this window, you can reset the user’s password by clicking the ‘Password Reset’ button.
- After entering the new password, be sure to click ‘Reset Password’ to confirm the change.
In the ever-evolving landscape of cloud security, managing user accounts is a fundamental practice. By following these steps, you can confidently create, assign roles, and maintain user accounts while ensuring a high level of security for your cloud-based operations.
Leave a Reply